The one-day install, step by step
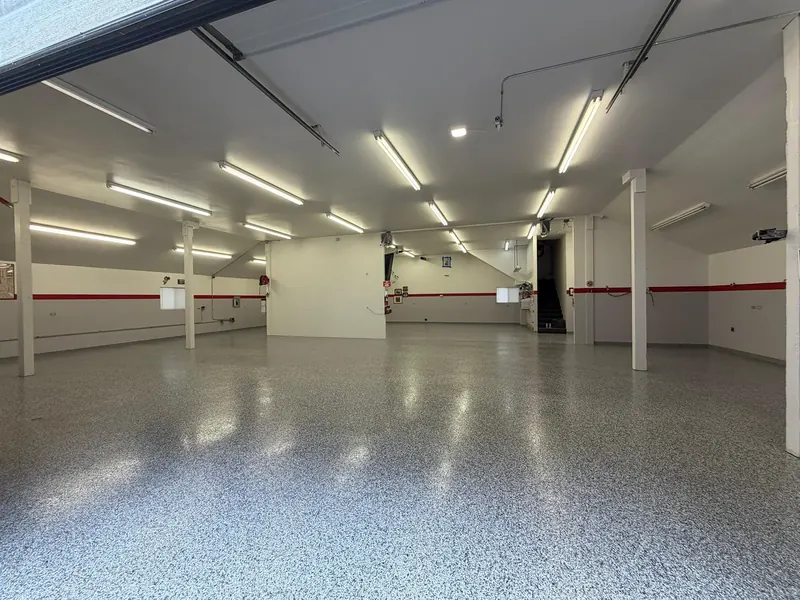
Most people book a garage floor coating without ever having watched one go down. They know the garage will be off limits for a day and the car will sit in the driveway for a few days after that, and not much else. This guide walks through the work in the order it happens and explains why each step is there, so nothing on the day comes as a surprise.
Rhino Coatings installs a polyurea base coat with a polyaspartic top coat over diamond-ground concrete. We do not install epoxy, so the steps below describe our system. You will not find clock times here. How long each step takes depends on the slab in front of us, mainly its size, how much repair it needs and how cold it is. The order of the work is the same on every floor.
Before the crew arrives
Install day really starts at the free on-site measure. A rep measures the garage, checks the condition of the concrete and lays flake and silica samples on your own slab, and you get a fixed, written price. That visit is where the surprises should get found, such as cracks and spalls that need repair, an old coating that has to come off, or a slab that needs a closer look. The condition of the slab decides how much grinding and repair it needs, which is why the price is set at that visit, with no surprise charges on install day.
Settle on a finish
The finish goes into the floor partway through the day, so it has to be chosen before the crew starts. Every floor we coat gets either flake, in 13 blends, or silica, in 1,700+ colors. The rep brings samples to your garage so you can hold them against your own concrete in your own light, which tells you far more than a photo on a screen.
Clear the floor
For the install, the floor has to be clear. That means anything standing on the slab, from boxes and bikes to shelving units and the second fridge, so the whole floor can be ground and coated. If you need help moving things, tell us when you book.
Move the cars, and plan where they will sit
Cars come out before the crew arrives and stay out until the floor is ready to drive on, about 72 hours after the top coat goes on. Plan where they will sit for those days, whether that is the driveway or the street, and check whether your neighborhood has rules about leaving a car on the street that long.
Plan another way into the house
From the time work starts until about 8 hours after the top coat goes on, plan on nobody but the crew walking on the floor. If the garage is how your family usually comes and goes, use the front door that day. You can be home during the install. The crew works around you, as long as nobody walks on the floor until it is ready. Keep pets and children out of the garage, and keep the door from the house closed.
If the slab is cold
Coatings cure through a chemical reaction, and like most chemical reactions it slows down in the cold. A cold slab can lengthen the install day and the cure, so on cold-weather jobs we confirm the walk-on and drive-on timing before we start, or we move the date. Either way, you know before the crew starts grinding.
Step one: diamond grinding
Every slab we coat is diamond-ground first. We do not acid-etch. The grinder takes off the weak top layer of the concrete, along with any old paint, epoxy or sealer, and opens the pores so the base coat can bond into the slab instead of sitting on top of it. On a new slab, grinding also takes off the smooth trowel finish and any curing compound that was sprayed on, and a coating struggles to grip either one.
This is the step everything else depends on. A coating is only as good as the concrete under it. When we are called out to a floor that is peeling or bubbling, the problem almost always traces back to prep that was not done this way, and grinding is where that prep starts.
What you will hear and see
Grinding is the noisy part of the day, and it is the step that makes dust. Professional floor grinders are usually run with an industrial vacuum attached to pull the dust off as they cut. Even so, it is a good time to keep the door to the house shut. When the grinding stops, the slab has a fresh, even surface, and cracks, chips and old patches are easy to see.
Step two: cracks, joints and damage
With the slab ground, the crew repairs what is left to fix. Cracks and control joints are filled with polyurea. Spalls and pitted areas are repaired, and a damaged edge or threshold at the garage door can be rebuilt to its original profile. Repairs are ground flush with the rest of the slab, so the base coat goes down on one even surface.
The choice of filler matters. Concrete moves. It expands in warm weather, shrinks in the cold, and every freeze and thaw works it again. A rigid patch in a crack that keeps moving tends to crack back open. Polyurea stays flexible through freeze-thaw, so the repair moves with the slab instead of fighting it.
The repair also has to happen before any coating goes down. Coating straight over open cracks is how floors fail, so we never skip it.
A crack that is still moving, from settlement for example, is a different case. It may need a structural repair and some monitoring before the slab is coated, and the free measure is the time to find it. We do not pour, lift or level concrete, so a slab that has sunk or heaved needs that work done first. We can grind, repair and coat it after.
Step three: the polyurea base coat
The base coat goes down over the ground, repaired slab. It is polyurea, a flexible, fast-setting material, and it has three jobs. It bonds into the diamond-ground concrete. It stays flexible through freeze-thaw, so the floor rides the slab's movement. And it holds the flake or silica broadcast in place.
This is the layer that holds the floor to the concrete. Everything you see and walk on sits on top of it, so a base coat that does not bond takes the rest of the floor with it. The fast set matters too. A fast-setting base coat under a fast-curing top coat is a large part of why most garages are finished in one day.
Coatings can have a noticeable smell while they go down and cure, which is one more reason to keep the door from the house closed.
Step four: the broadcast, to full refusal
While the base coat is still wet, the flake or silica is broadcast into it by hand until the surface will not hold any more. That point is called full refusal. On a flake floor, it means handful after handful thrown across the whole floor until no base coat shows through. Silica goes in the same way.
The broadcast gives the floor its color, its texture and its grip. A full broadcast builds a dense, slip-resistant surface with real depth. Flake hides dust and tire marks, and silica grips better when wet, which is why we recommend silica for patios, walkways and floors that get wet often. Both go into the same polyurea base coat and get the same top coat.
Step five: the polyaspartic top coat
The last coat is a UV-stable polyaspartic top coat. It seals the broadcast in, so the flake or silica becomes part of one solid surface instead of loose grit, and it becomes the layer you actually live on. It resists hot-tire pickup, oil, road salt and deicer. It is a more abrasion-resistant top coat than epoxy, and it does not yellow in sunlight, so the strip of floor in front of an open door stays the same color as the back of the garage.
The top coat is the layer that takes the hot tires, the dripping slush and the dropped wrench. It is slip-resistant too, so the finished floor has grip as well as a surface where spills wipe up with a rag.
After the top coat: walk in about 8 hours, drive in about 72
When the top coat is down, the crew packs up and the floor is left to cure. You can walk on it in about 8 hours. You can drive and park on it in about 72 hours, once it has fully cured.
- The first evening. Stay off the floor until it reaches the walk-on point, even for something you need from the garage.
- Foot traffic. After about 8 hours, normal walking is fine.
- Heavy things. Ask the crew before a freezer, a loaded shelving unit or a tool chest goes back on the floor.
- Cars. About 72 hours, or on a cold slab, the timing we confirmed with you before we started.
What can make the day run longer
Most garages are done in one day, including three-car and oversized garages. A few things stretch the day.
- A cold slab. The cure slows in the cold, which can lengthen the day. That is why the timing is confirmed before we start.
- More repair. A slab with more cracks, spalls and pitting takes more repair before the base coat can go down.
- An old coating. Old epoxy, paint or sealer is ground off to bare concrete, so a floor that has one takes more grinding.
- A very large floor. Very large or commercial slabs may be phased, and a large shop can take 1 to 3 days. The timeline is confirmed at the free estimate.
Why the order never changes
Each step is there because the next one depends on it. The top coat is only as good as the base coat it is bonded to. The base coat is only as good as the concrete it bonded into, and that comes down to the grind and the repairs. Skip or rush one of them and the problem rarely shows on the first day. It shows up later, as peeling at the door or a crack coming back through the finish.
That is also why the questions you ask before you hire anyone matter more than how fast a crew promises to finish.
Questions to ask any installer about the day
- Do you grind or acid-etch? Grinding opens the concrete so the base coat bonds into it.
- What goes into the cracks and joints? You want a fill that stays flexible and moves with the slab through freeze-thaw.
- What are the base coat and the top coat, and is the top coat UV-stable? If it is not, the floor near the door can yellow.
- When can I walk on it, and when can I drive on it? Ask what changes on a cold slab, and when you will be told.
- Who does the work? Ask whether the crew works for the company you are hiring. Ours does. We do not subcontract.
Garage floor coatings in the towns we serve
We coat garage floors from our Coeur d'Alene shop across North Idaho and the Spokane area, and from our Boise location across the Treasure Valley, with our own crews. See garage floor coatings in Spokane, Coeur d'Alene, Post Falls and Boise, or read how each layer of a garage floor coating goes down. If your slab is brand new, when you can coat a new concrete garage floor covers the waiting, and polyurea vs polyaspartic explains why the base coat and the top coat are two different materials.
Residential and commercial floors carry the same lifetime warranty against peeling, delamination, and hot-tire pickup. The first step toward install day is a free on-site measure: we look at your slab, show you colors on your own concrete and give you a fixed, written price.